For those who have chickens in their yards, a reliable automatic coop door is the holy grail. The end of constant fighting over who will go outside to close the coop…the end to dreading that you’ll forget to close the coop and inadvertently fatten a local raccoon while traumatizing (and downsizing) your flock.
After about a year of having our chickens in a tractor-style coop (they are always enclosed in the coop, but you move it around), we decided to just let them free-range. Thus, the coop-closing issue was born. Soon after I decided to take a look around at the state of the art, see what other chicken keepers had used to solve this problem. Reading forums and watching videos, it seemed like the market was full of expensive solutions or garage-built ones. I wanted simple, effective, and less than $200.
I’ll skip the gory details, but it was a disaster. It often was stuck open, and just never worked right…even after significant re-design. The winding-a-string method of moving the door coupled with trying to slide a door in a simple notch left lots of room for malfunctions.
After a year of fiddling with the off-the-shelf door, I was determined to make something better. Something more reliable, where you’d never have to worry about the door getting stuck, where the door was actively held down when closed so nothing could pry it up and get in.
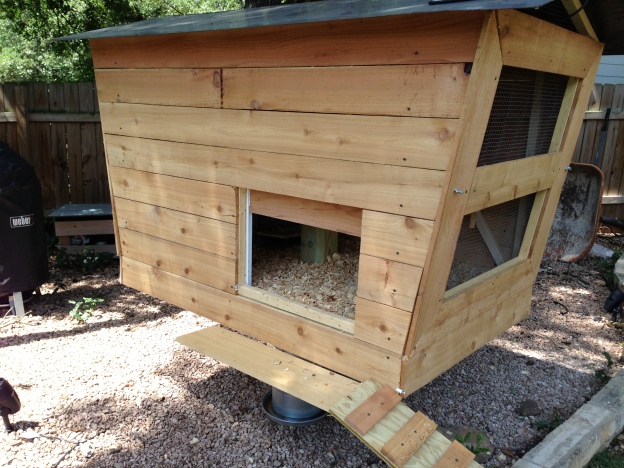
I ended up with the design you see in the pictures. I recently installed it into a new coop. Instead of a motor winding a string, I used a linear actuator. The improvement here is that you’re still using a motor, but that linear actuators can have a static loading capacity. This basically means that when the actuator stops, it holds whatever its attached to in place (so raccoons can’t just slide it up, for example). Linear actuators, in addition, often have position-limiting circuitry built right in…no more hodge-podge limit switches exposed to the elements.
WARNING: if you make a similar door, make sure you pick an actuator that is both slow (1.5 inches per second or slower), and relatively weak (15lbs force or less). We don’t want to create a chicken guillotine!
The second breakthrough was the use of a cheap drawer-slider to aid in reducing friction of the movement of the door. The sliders act as a track, keeping the door in place horizontally, and the wheels on the track allow for very little friction as the door moves up and down. I used the simplest (and cheapest) type of track-slider, the ones with small nylon wheels in them…I was afraid that the bearings in more expensive models would get fouled (no pun intended) by being outdoors and exposed to the dust/dirt.
I’ve got a video walk-through of the door installed on my old coop:
The control circuitry is based on a couple of wildlife feeder timers that I happened to have on hand already. These are designed for remote (solar) installations, so they are very low power. They simply trip an internal relay for a user-settable duration at up to 6 times per day. They have four wires, two connect to the power source, and two go to the device to be controlled by the timer.
Usually these timers just control a simple motor that spins in one direction. With this linear actuator, however, we need to spin the motor in both directions: one way to open the door, the opposite way to close the door. With motors, reversing them is as simple as reversing the polarity of the power-source, but achieving this with these off-the-shelf timers requires some external circuitry. Below is a diagram (while it looks complex, it really is quite simple).

The single-pull double-throw (SPDT) relays control the polarity going to the actuator based on which timer is activated.
Here are the key parts:
- Timer units (2 @ $30.00)
- 12V actuator (1 @ $110.00 – the actuator I used is discontinued, this one is equivalent)
- Actuator mounting brackets (2 @ $10.00 – these seem expensive for what they are, feel free to experiment and DIY)
- 18 inch drawer slider ($7.50 – also available at hardware store)
- Perf board for control circuit (5-pack for $7.00, you can get singles at Radio Shack)
- SPDT relays (5-pack for $6.00 – also available at Radio Shack)
- Wire terminals (5-pack for $6.00 – also available at Radio Shack)
- Solar Panel and Charge Controller ($35.00 – only if you’re going to use solar to charge a battery-powered install)
- A 12V battery. A car battery is expensive and is probably overkill unless you live in an area where solar power will be unreliable. I use a lawnmower battery that I had from a previous project, but you could use an even smaller one.
So, all tolled up this is more in the $250 range, however, I did already have the timers and the battery on hand so I slid in at less than $200 in new expenditures The increase in reliability is well worth the extra effort. The door has never failed, caught a chicken, or gotten stuck. I find that I have to adjust the timers for changing daylight once every couple of months, which lets me check on the battery charge level at the same time (the timers show battery voltage).

Great write up, I have the same idea and it’s nice to see your layout.
Not sure if you monitor this anymore but…. Really like your plans. How big is the stroke on the actuator?
Hey Ric, I need to post more, got a new job and a baby.
The stroke is 12ish inches, I believe. I’ve seen our full size hens squeeze out of 8 inches or so if the door is opening late.
I’ll also report here that the door is still working great.
Awesome, just finishing up our coop for our first flock. The link you had for the actuator you used is dead but I see plenty on EBAY. Anything in particular that I should look out for?